
I have made a start today on the restoring of the Oak fire surround. You can read about part 1 here, part 2 here, and part 3 here.
I have now completed all the repairs on the fire surround and everything is glued and pinned into place so now begins the colour matching process
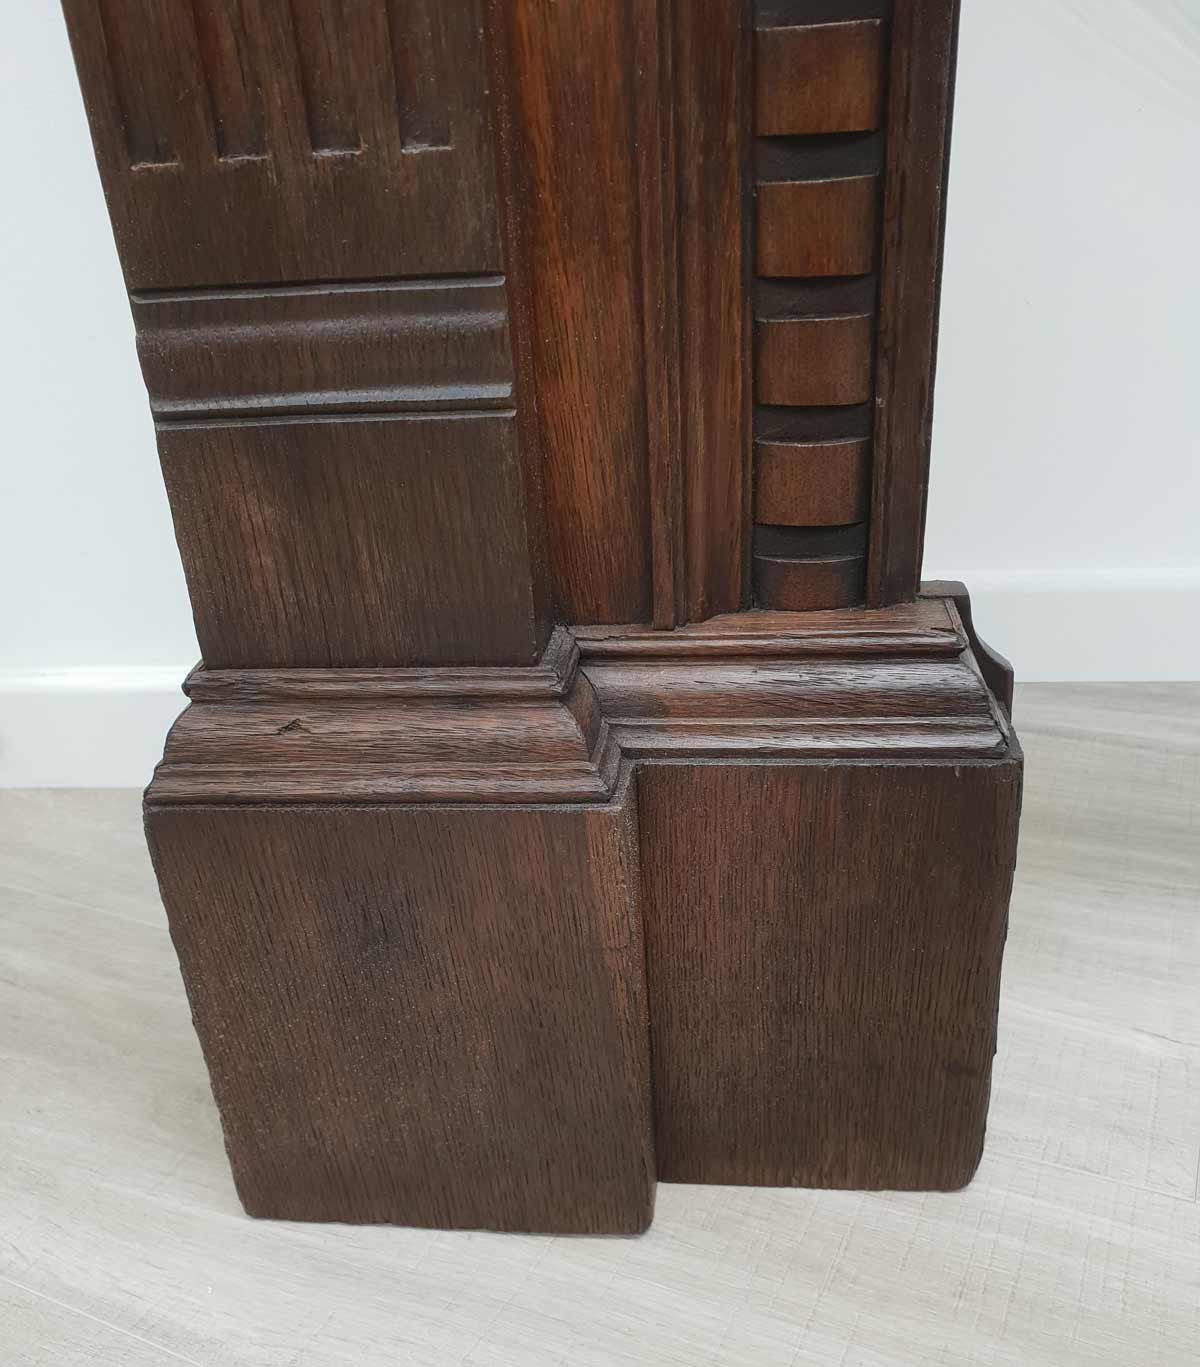
I first did some tests on scraps of the timber offcuts used in this project and wanted to keep it as simple as possible so have used a minimal approach whilst achieving the required colour – i have reached a satisfactory colour match that i am happy with so here goes – i am committing to the decision and applying this to all the repairs

The products i have used are all from Liberon and are a spirit woodstain in dark oak, iron paste where needed to darken certain areas and black bison wax in Tudar oak
I used a short bristle brush to apply the paste and wax and a Wax polishing brush to buff everything once dry then finished off with a lint free cotton cloth to bring everything to a good shine
I am really pleased with the results and colour matching to the original piece


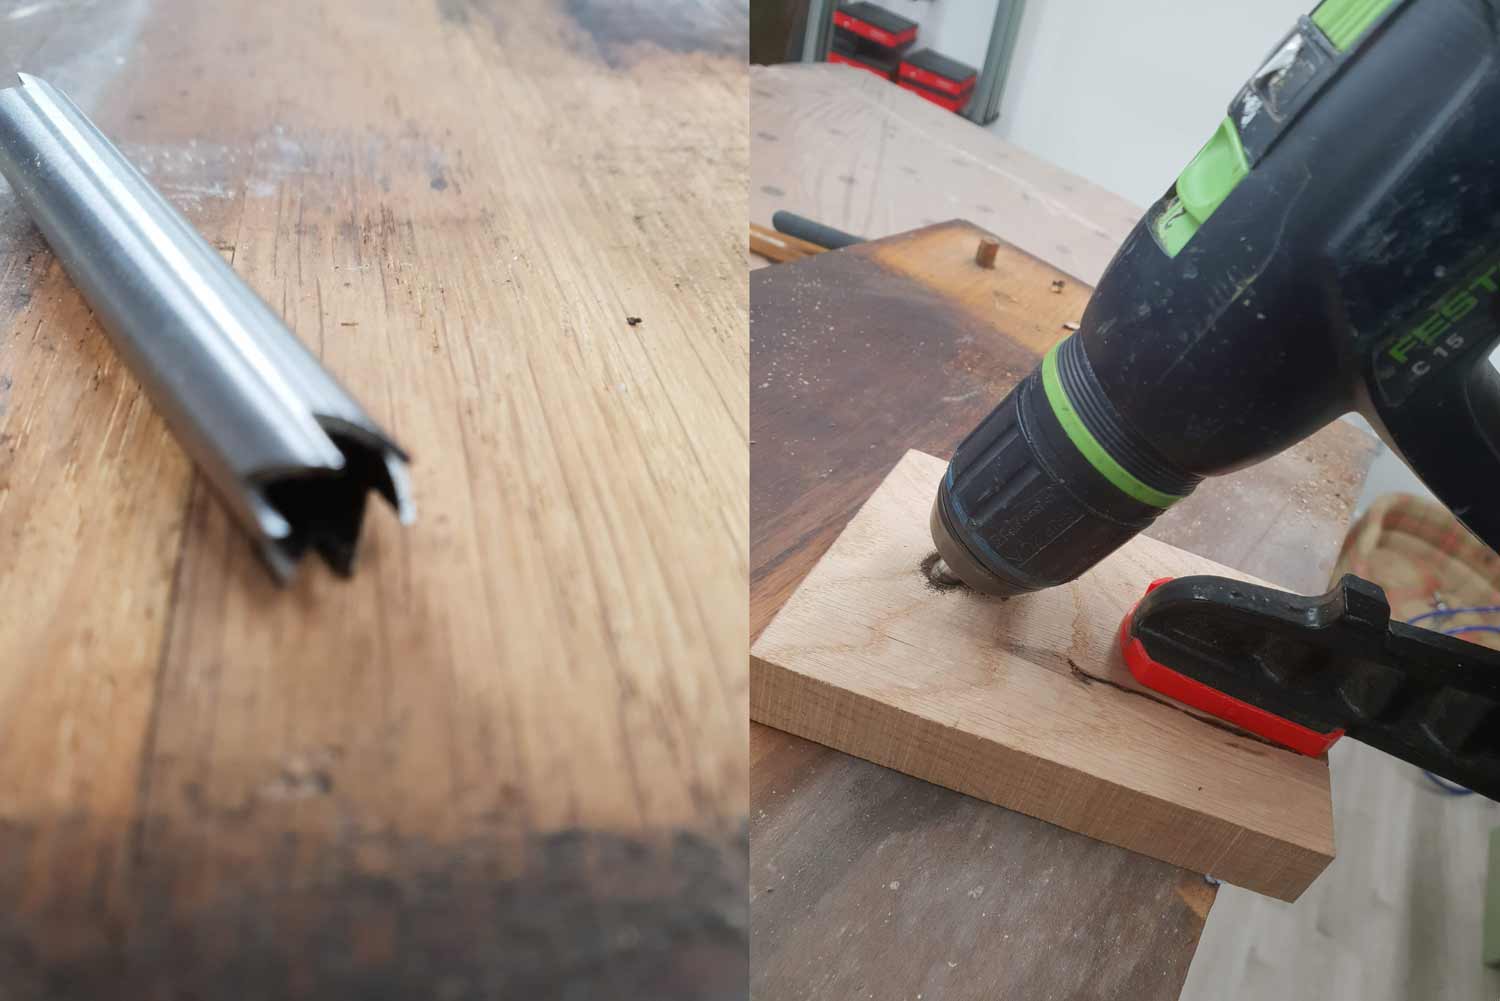
My next mission was to remove the screws left from parting the two components – the head part of the screw came out easily from the mantle but the screw thread was left engaged in the surround and was embedded deeply in the mantle – i used a wood-river hollow screw remover – this is basically a tube with teeth operated in a cordless drill
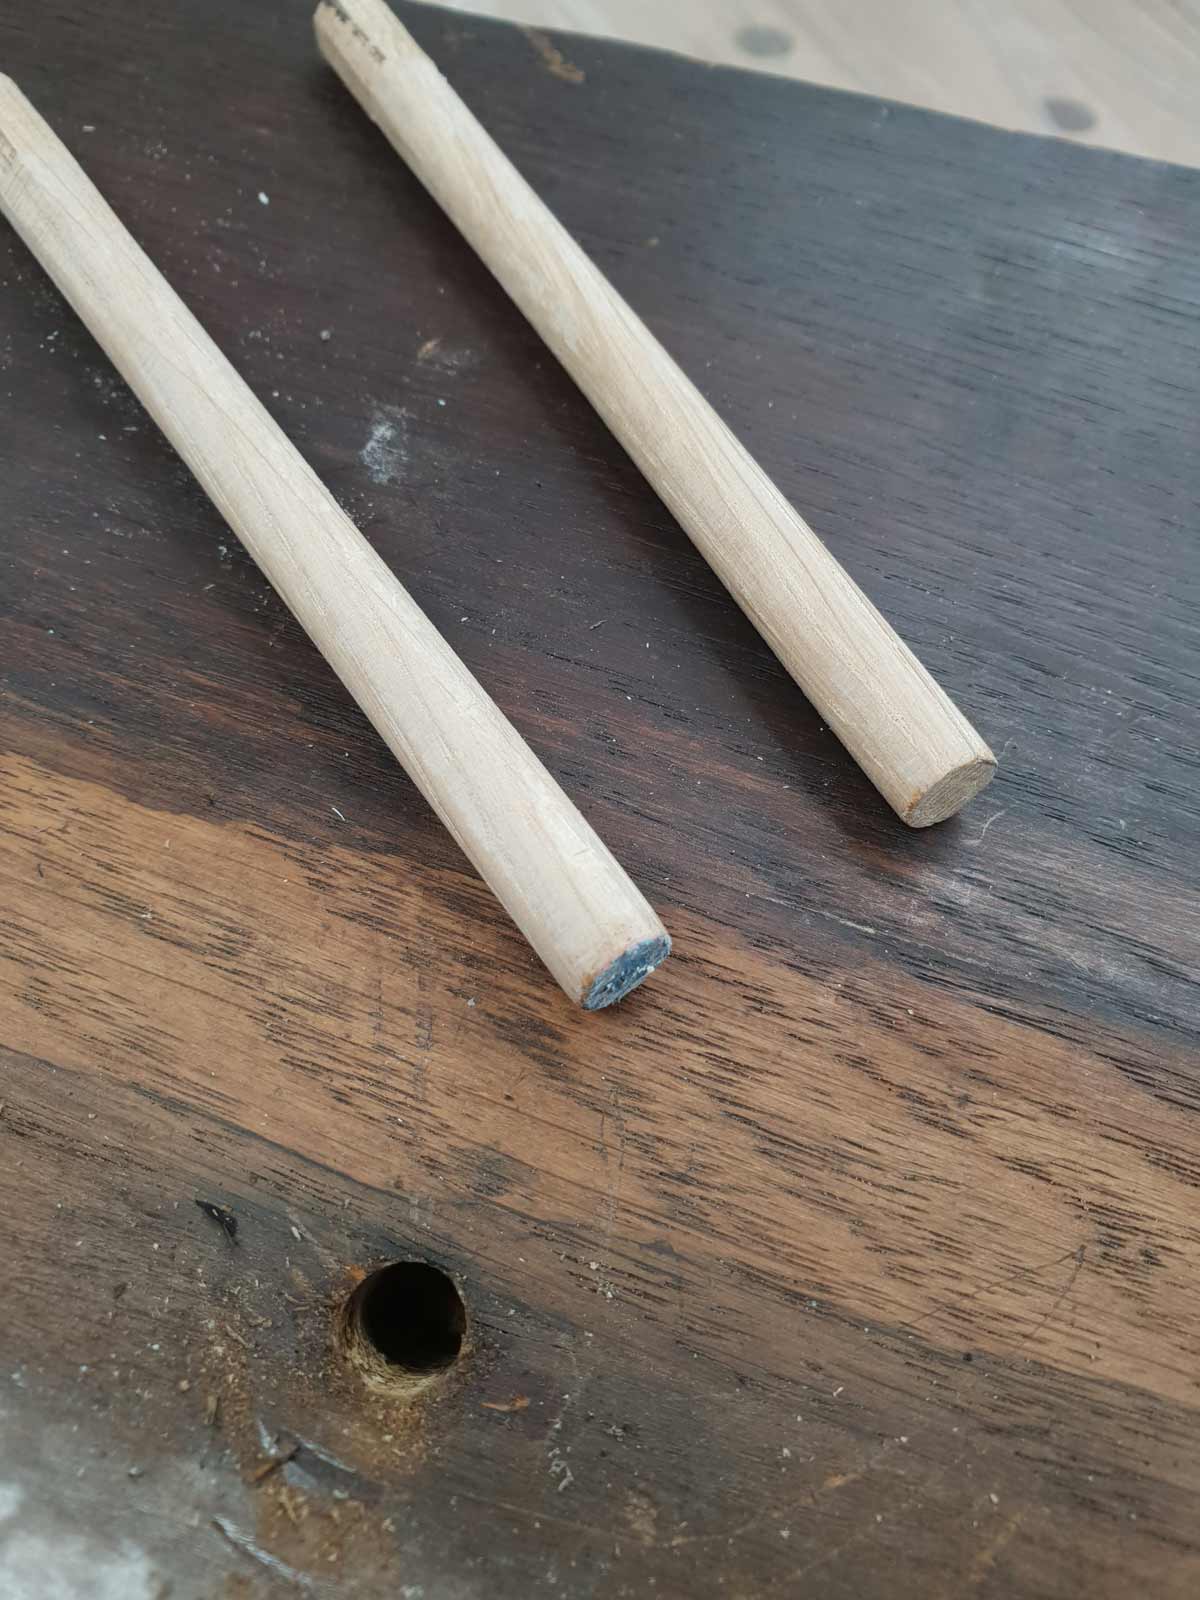
I gauged the angle by setting my bevel gauge with a screw loosely placed in the existing screw fixing points and then made a drilling template to guide the drill which i clamped to the mantle and drilled around the embedded screw This removes a plug of wood with the thread part of the screw within it leaving a clean hole – then i made some new oak dowels of the same diameter, applied glue and tapped then into place
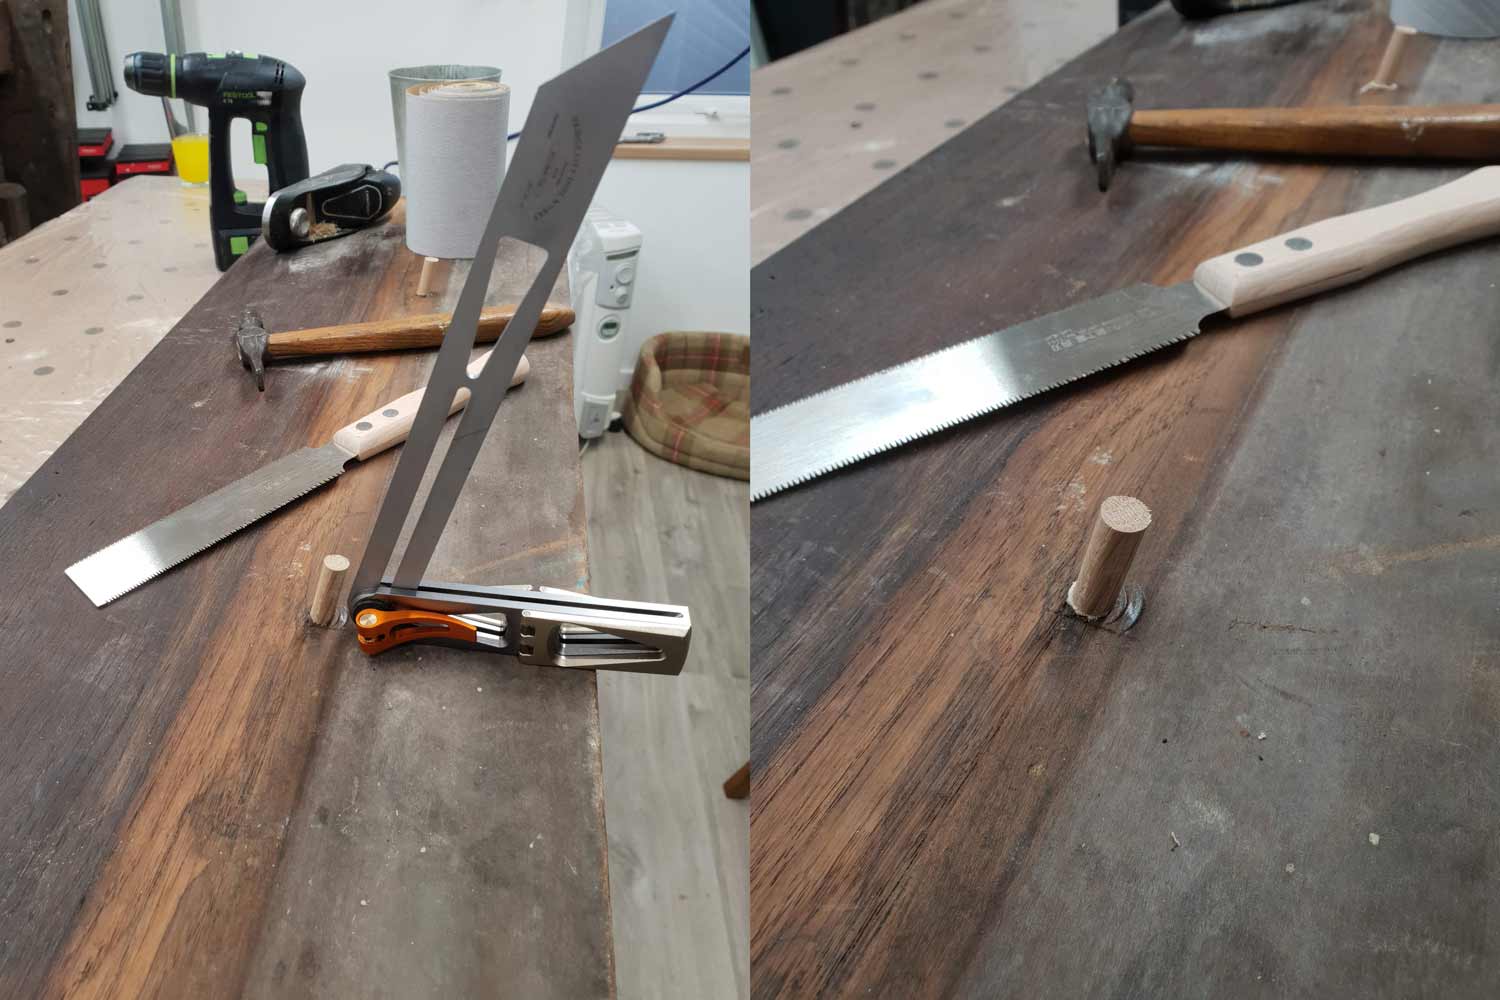
Once the glue had dried they were cut off with a flush cutting japanese saw which has a tooth set on only one side so it doesn’t damage the surface you are cutting against


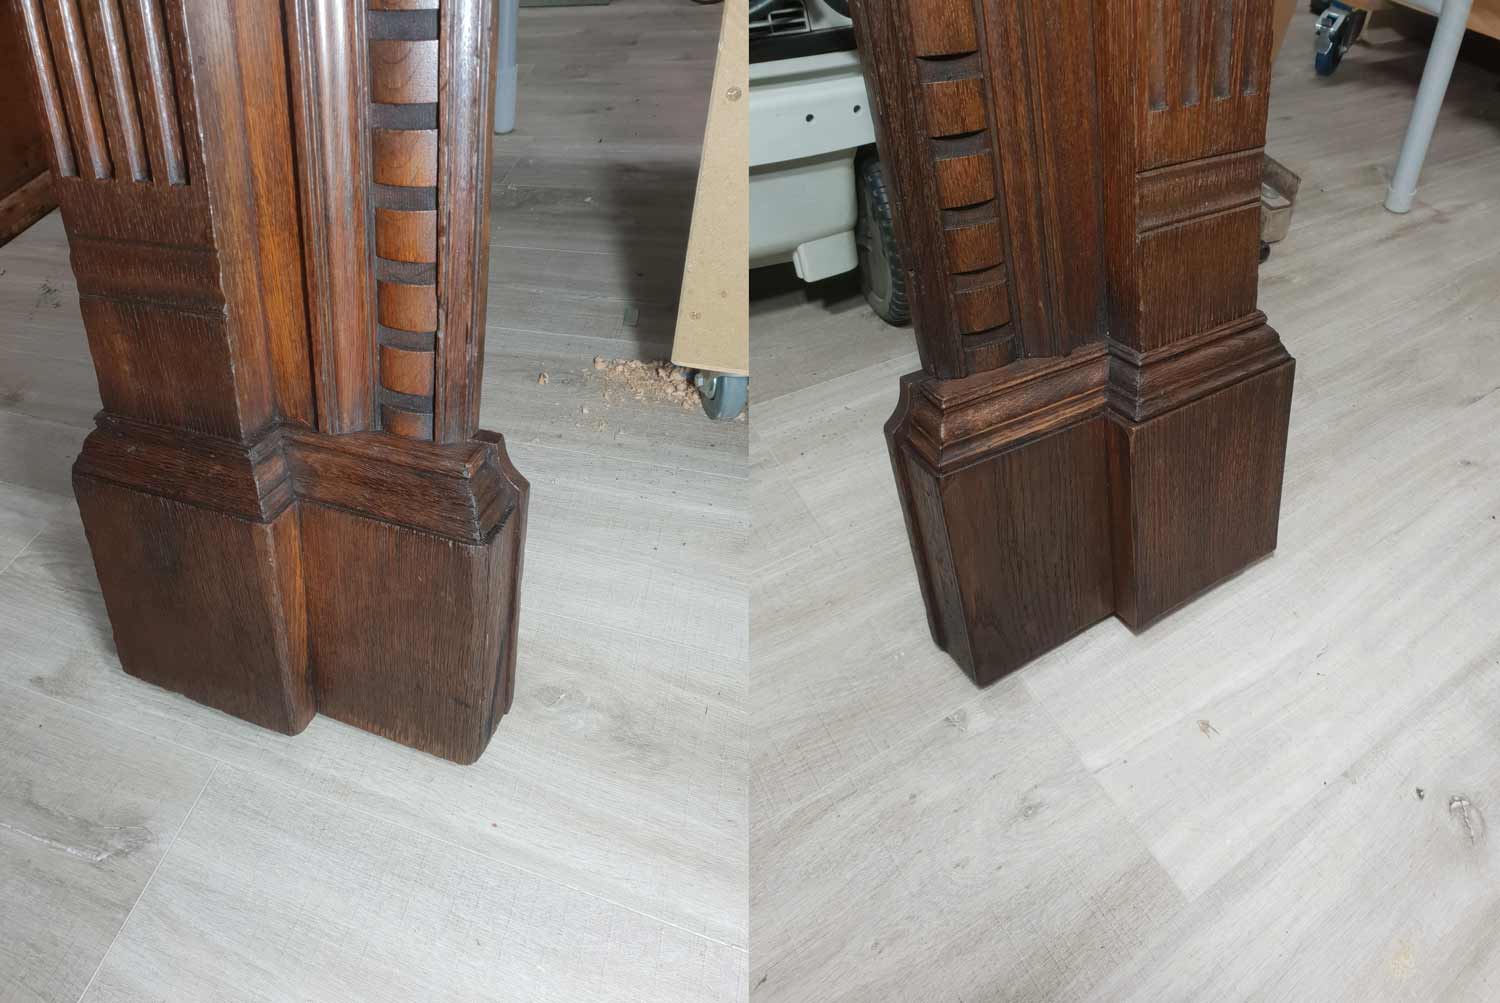
It was then – the do i or don’t i moment ? Do i remove the damage to the front edge ?
Well to be honest i couldn’t help myself – i thought in for a penny in for a pound so i went for it – i used a very sharp chisel to remove the damaged areas and then machined some matching oak 5mm x 3.5mm to repair the areas i had removed pinning and gluing these pieces into place

Next the top had some glue and clamps applied to bring the top back into position where it had curled slightly

Once everything had a chance to dry I could then proceed with getting the two components back together at last to reunite them as they once were
I used the Festool Domino XL machine to drill new holes so I could re attach them in a more modern way than using dowels as they were joined before
This machine drills an oval hole to any depth you wish and a corresponding dowel is then glued in to secure them together with a dash of glue also on the top of the Corbels for good measure – here I chose to use polyurethane glue for added strength

I placed heavy weights on the top to keep everything in place whilst the glue dried and placed screws back in their original place at the back of the surround screwing firmly into the new oak dowels i fitted
That’s basically everything completed now and ready for the customer


This has been a very nice project to do in the workshop and i have thoroughly immersed myself into it and enjoyed every single minute of doing it – i have taken a real pleasure from being able to work on such a beautiful piece and am sure next weeks blog will seem a little flat compared to this one
I invited my customers to the workshop to see the finished project and they were so happy with the results and can’t wait to get it installed into their house – so once this happens i will get a final picture to post for you all
Mission accomplished – another happy customer 🙂